If you’re looking for how to connect marine instruments to NMEA, you’ve come to the right place!
In this comprehensive guide, we’ll explore the essential steps and considerations involved in connecting your marine instruments to the NMEA network. This will enable seamless communication among your devices, ensuring you have accurate navigation and operational data.
What is NMEA and Why Use It?
NMEA, or the National Marine Electronics Association, is an industry standard that facilitates communication between various marine electronic devices, such as GPS receivers, fish finders, and chartplotters.
By using NMEA protocols, you can achieve the following benefits:
-
Interoperability: Different manufacturers’ devices can work together without issues.
-
Real-time data sharing: Instruments can share data, improving situational awareness.
-
Simplified installations: Connecting devices within the same NMEA network is often more straightforward.
Understanding these benefits can help you determine how to connect marine instruments to NMEA effectively.
What Equipment Do You Need?
Before learning how to connect marine instruments to NMEA, it’s important to gather the necessary equipment. Here’s a quick checklist:
-
Marine Instruments: GPS units, radars, and depth sounders that are NMEA compliant.
-
NMEA 0183 or NMEA 2000 Network: Depending on your devices, you may be using either protocol.
-
Cabling and Connectors: Ensure you have the right cables and connectors for seamless integration.
-
Power Supply: Proper power management is critical for reliable operation.
-
NMEA Multiswitch or T-connector: Necessary for expanding your network.
-
Software/Apps: Sometimes, you’ll need specific software to configure your devices.
Ensuring you have these pieces of equipment will set you up for success when learning how to connect marine instruments to NMEA.
How Do You Set Up the NMEA Network?
Setting up your NMEA network can be a straightforward process if you follow these steps:
1. Choose the Right NMEA Version
Determine whether your devices support NMEA 0183 or NMEA 2000.
-
NMEA 0183 is the older standard and typically uses serial communication.
-
NMEA 2000 is more modern, utilizing a CAN bus and allowing for greater data transfer rates and multiple device connections.
2. Install the Backbone
For NMEA 2000 networks:
-
Run a backbone cable along your vessel, ensuring you comply with manufacturer recommendations on lengths and placement.
-
T-connectors can be used to connect different devices to this backbone.
For NMEA 0183 networks:
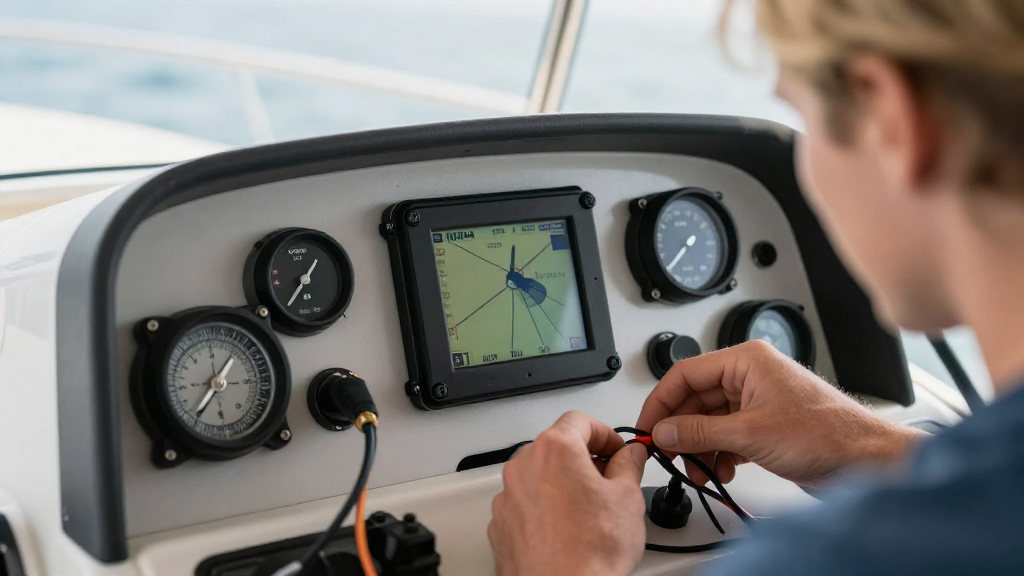
- Connect the instruments’ transmit (TX) and receive (RX) wires accordingly, ensuring proper polarity.
3. Connect Your Instruments
Now that the backbone is in place, it’s time to connect your instruments:
-
NMEA 2000: Use T-connectors to attach each instrument to the backbone. Make sure all connections are secure.
-
NMEA 0183: Connect the TX and RX wires of each device. Typically, A and B connections are used. Refer to your device manuals for these specifications.
4. Power the Network
Make sure your NMEA network is powered:
-
NMEA 2000 networks can draw power from devices connected to them via the backbone.
-
For NMEA 0183, you may need a dedicated power supply, especially for devices such as repeaters or additional sensors.
5. Test the Connections
Once everything is connected, it’s important to test the setup.
-
Ensure each device communicates effectively with the others.
-
Check for errors or data conflicts.
How to Configure Your Devices?
After connecting your marine instruments to the NMEA network, configuring them correctly is crucial.
1. Access Device Settings
Many modern instruments have a menu system that allows you to adjust settings.
- Access the network settings via the display on each device.
2. Enable NMEA Settings
-
Make sure to enable the NMEA output settings on each device.
-
Depending on the device, this might include selecting the NMEA format (either 0183 or 2000).
3. Test Data Flow
After configuring the devices:
-
Use available diagnostic tools within the device settings to ensure data is flowing.
-
This might include checking error messages or confirming data outputs.
4. Update Software/Firmware
Check if your devices require software or firmware updates. Keeping your firmware current can help:
-
Improve communication reliability.
-
Fix any known bugs or compatibility issues.
Common Issues and How to Troubleshoot Them
If you encounter issues when learning how to connect marine instruments to NMEA, here are some common problems and solutions:
1. No NMEA Signal
If you’re not receiving any signal:
-
Check all electrical connections for loose wires.
-
Ensure the correct NMEA protocol is set on each device.
2. Data Conflicts
If multiple devices are returning conflicting data:
-
Verify whether they are set to different sources for the same data type.
-
Make adjustments in settings to specify data sources.
3. Inconsistent Data Transmission
If data isn’t consistently being sent or received:
-
Check for any possible interference from other electronics aboard your vessel.
-
Make sure your boat’s power supply is stable and not fluctuating.
Conclusion: Why Is It Essential to Learn How to Connect Marine Instruments to NMEA?
Learning how to connect marine instruments to NMEA is vital for enhancing your boating experience.
By ensuring that all your devices communicate effectively, you gain:
-
Improved navigation and accuracy in readings.
-
Enhanced safety on the water.
Following the steps outlined in this guide will help you seamlessly set up your NMEA network, providing you with reliable, real-time data as you navigate.
Now, gear up for your next maritime adventure with confidence—knowing that your instruments are well-connected!